NDS Steps recorder is a tool used to record actions taken by one user while using NDS.
Once
recorded, the actions and the screenshots taken will be stored in a file that
can be sent to RUM&N staff to help troubleshooting.
It could also be
sent to other NDS users to check the procedure you are following to do some
operations.
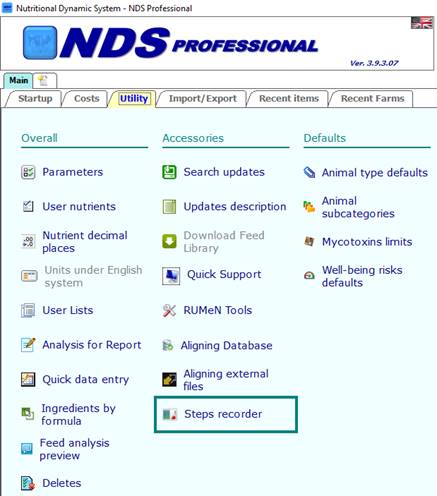
Open the Steps recorder
You can access
the Steps recorder directly from NDS à Utility tab à Steps recorder.
This will open the Steps recorder, that will be available over every other NDS form.

You will find several buttons in the Steps recorder form:
− Start recording: this button will allow you to start a new recording.
− Stop recording: this button will stop the current recording
− Send recording as an attachment: this button will open the default mail provider (if installed) with the latest recording as an attachment.
− Delete recording: this button will delete the latest recording.
− Open file: this button will open the latest recording file.
− Open folder: this button will open the folder where all the recordings are stored.
To send a recording file to RUM&N Staff, please send the recording to info@rumen.it
Opening recording file
The latest
recording that you create could be opened with the Open file button.
If you want to open an older recording or you want to open a recording
from another user, you should check the instruction in the Recording file
management section below.
This is one example of a recording file:
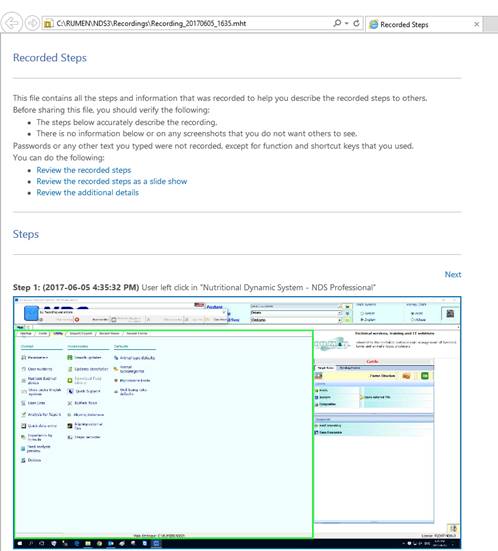
In the first section, you have some options that could change the way to display the file:
− Review the recorded steps: this option will bring you directly to the second section, where you have all the recorded steps with the screenshots and descriptions.
− Review the recorded steps as a slide show: this option will display all the recorded action as a slide show.
− Review the additional details: this option will bring you directly to the third section, where you can see the details and the descriptions of the steps recorded (but without screenshots).
In the second
section you will see all the recorded steps with a description and the
screenshot.
In the previous example, this section starts with the Step 1 of
the recording, that will display the date and the description of the action
taken.
In the third section, you will see the details of the recording and the description of the steps, without the screenshots.
Recording file management
When a
recording is stopped, it
will be automatically created a .zip file with the latest recording.
If you
want to open a recording file from the folder, or if you receive a .zip file
with a recording, you will have to unzip the file first.
To unzip the file you can follow this simply procedure:
− Double click the .zip file in the folder.
− Windows Explorer will show you the files contained in the .zip file. You can view the file directly from here by double-clicking on it, but you should extract the file before opening it.
− You can extract the file in many ways:
•In the folder menu, click on Extract all – this will require to select a folder where the files will be placed after the extraction.
•Right-click on the file (or the files) to extract, select Copy to make a copy, then close the .zip file and paste it on the destination folder.
•Drag the file (or the files) from this .zip folder to another folder.
•You can also right-click directly on the .zip file and select Extract all from the submenu.
After the extraction, you will be able to see a file with the extension .mht.