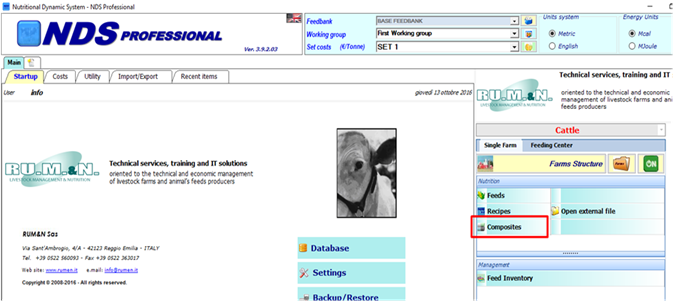
First of all, you will have to click on the button Composites from the main page of NDS Professional.
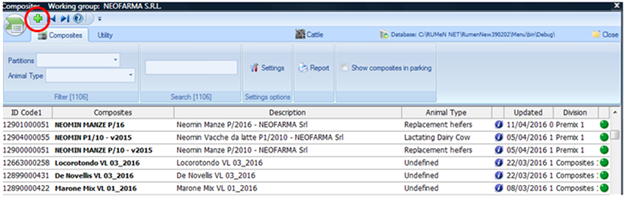
You will access this way the list of your composites; click on + on the upper left corner to make a new composite.
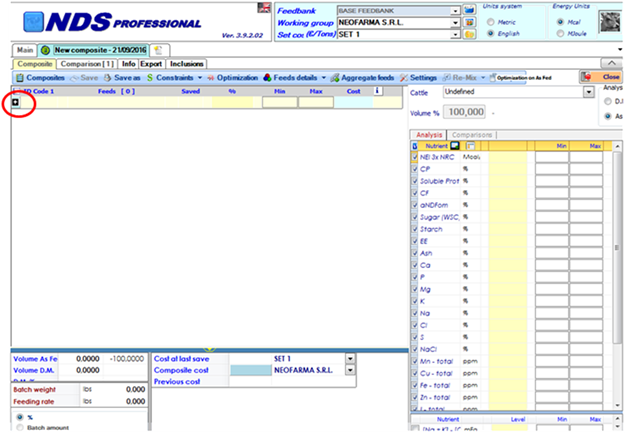
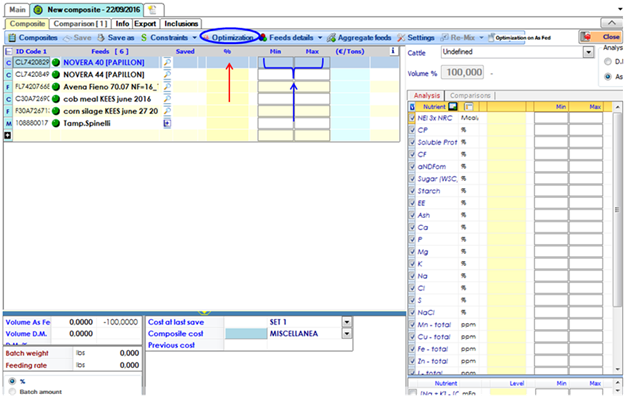
A blank composite template will appear.
The first thing to do will be to add new ingredients. In order to do so, you will have to click on the black + on the left of the screen (shown in the picture).
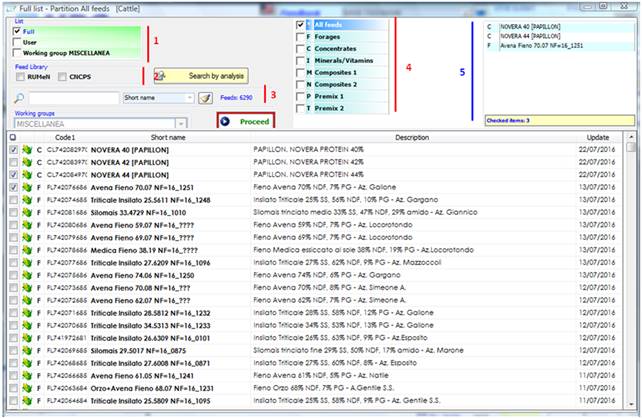
A screen with all your ingredients will appear and you will be able to choose which ingredients to add into the composite.
You can insert both single feeds (concentrates, minerals, etc.) and other composites. In other words it is allowed to include a composite within another composite.
This screen contains several filters that will allow you quickly to find the ingredients of your interest.
Here is an explanation of their functions:
1: You can choose here if you want to display all the ingredients available, only those in the user lists or only those in the current working group;
2: You can choose here from which Feed Library you want to take your feeds from: RUM&N or CNCPS.
3: You can type here part of the name to find a specific ingredient;
4: You can also choose to see only a division of feeds or composites.
You can select the ingredients by clicking the checkbox on the left of each row; when you tick an ingredient, it will be reported in the box on the upper right box (marked here with the blue number 5).
This way, you will be able to view all the ingredients that you have selected.
Click on Proceed to confirm your choices. This way, all the selected feeds will populate the formulation screen.
Now you have ingredients in your new composite. There are two methods of formulation: Manual (what if) and by Least cost Optimization.
- Manual: Type the percentage of inclusion for each ingredient on the cells under the symbol % (red arrow), at the end of the process that the total should results = 100
- Least cost Optimization: Type minimum and maximum percentage amount that you want to get for each ingredient (blue arrow), set min and max for the nutrient you want to consider, and set the prices for each ingredient. Then click on the Optimization button. The Optimizer will automatically define the best inclusion of the ingredient in order to get a mix at the lowest cost.
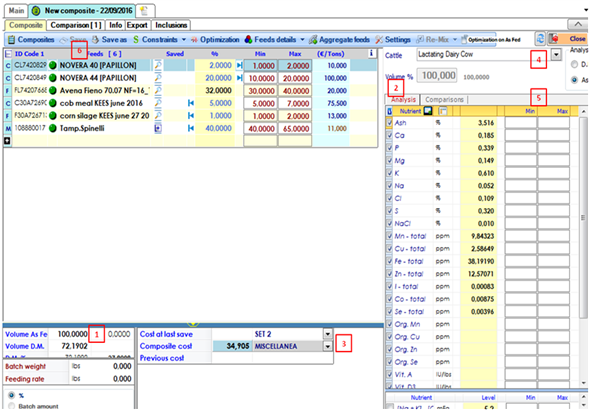
In the screen below, you will see the key features of a composite screen (you will find the number in the picture associated with the description):
1: After you complete the inclusion of your ingredients, please verify that the volume is = 100;
2: This is the column of the costs, here you will find the costs of your ingredients and you will be able to modify them;
3: You will find here the current cost of the composite (based on the costs in the column #2), the cost before the optimization and the cost at last save (empty if the composite is new). Costs are referred to the cost set and the working group showed in the relative drop down menu;
4: With this drop-down menu, you will be able to select the animal type the composite should be formulated for;
5: This table contains the customized nutrients specs of the current composite, you can modify min and max and restart the optimization for a more accurate result;
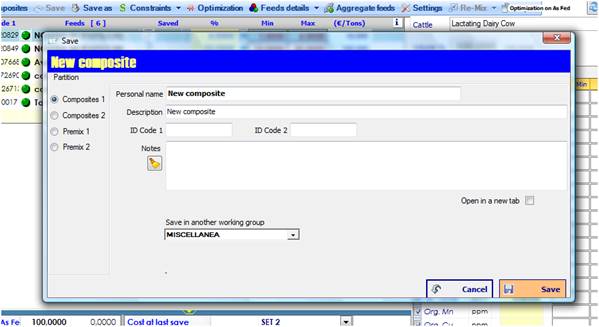
6: When the composite is formulated, you can save it with the Save as button. The composite will be saved in the current Working Group.
This is the Save As screen; you can type the name, description, ID codes and add some notes.
Choose the partition (Composite or Premix) for a better classification and click Save button.