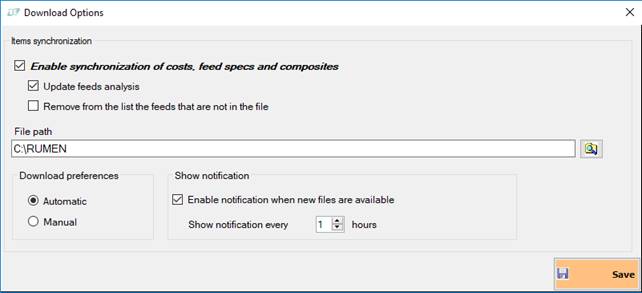
To enable the importing feature, you first need to open Download Options that will open a form, allowing the settings of the items synchronization:
In this screen, you can see:
- Enable synchronization of costs, feed specs and composites: this option, if checked, will allow you to do the Manual synchronization, or to set the Automatic process for the ingredient synchronization; to complete the process this option must be selected.
•Update feed analysis: this option will update the feed analysis of the feeds imported during the synchronization
•Remove from the list the feeds that are not in the file: this option will remove any feed that is not included in the imported file. This means that after the import, the list will include only the feeds contained in the file, and not any other feeds that you added (or imported) previously.
- File path: here you need to select the path (final folder) where the export files are stored by the NDS Administrator;
- Download preferences: here you have to select the Automatic or Manual process for the synchronization:
•Automatic process starts to run whenever NDS is opened: if there are new files in the folder selected in “File path” field, NDS will open a screen that will show the new files that can be imported, corresponding to the files previously uploaded by the NDS Administrator.
•Manual process can be started with the button Manual download though the Synchronize ingredients submenu.
- Show notification: in this section you can Enable notification when new files are available. This option will show a notification if there are new files available to synchronize. You can set up the hour interval of the notification. Please note that the notification will be shown while you are using NDS.
You need to click the Save
button when the configuration is completed.
Then you can
proceed with the Manual synchronization with the Manual download button,
or wait until you open again NDS to run the Automatic
synchronization.
Whenever the process scans for new files, this form will appear:
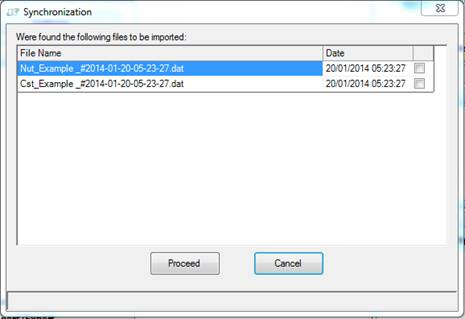
In this form, NDS will show
which files can be imported; with the Proceed button NDS will start to
import all the file in the list, that are automatically sorted by
date.
Depending on the number and size of the files
listed, the process may take a few minutes.
The checkboxes in the third column will be checked by the procedure when the file in that row has been correctly imported (process of each single file completed).